Be Their Guest Disney Blog

main street stay play dine the hub Image Map
Showing posts with label stay. Show all posts

Tuesday, December 10, 2013

The Following Message Will Self Destruct...

     Check out the new secret mission USBs Disney is sending to their Magicband guests. In preparation for a visit to Walt Disney World, guests are receiving a tutorial for the Disney Magicbands. The Tutorial is delivered in the same Incredibles packaging as the Magicbands. Inside the box is a neat Mickey head USB stick to play on your computer.
photo by Steven C.
     Once you get the video running you get a description of how the Magicband works as told by Edna Mode of The Incredibles. The video is similar to this one. The best thing is that after the USB drive is plugged in, it lights up green just like the Magicband stations throughout the parks at Walt Disney World.
photo by Steven C.
    I hadn't seen these until yesterday and now I want one. How many of you have received this top secret Mickey USB drive?

If you'd like to know more about Magicbands check out our previous post Our Magicbands Have Arrived.

Sunday, September 8, 2013

Fall/Winter Free Dining at WDW!!

Here's a friendly reminder! Only one more week to book Disney's Fall/Winter FREE DINING offer. This is one of the best discounts available. There are limited arrival windows in September through December. You will receive a free Quick Service (if you stay at a Value Resort) or Standard Dining (if you stay at a Moderate or Deluxe Resort) plan with a non-discounted stay at a Disney Resort. You must book by September 15th and availability is limited. Click the link for more information.

Disney World Free Dining

We highly recommend the Disney Dining plan. We have traveled with the dining plan every visit since 2006. To find out more information about the Disney Dining plan please review our previous post - I'm a Disney Dining Plan Expert. And for information on where to use your free dining credits check out our Dining Favorites Series.

Monday, August 19, 2013

Disney Resort Refillable Mugs

Have you every purchased a refillable mug during a Disney resort stay to have endless coffee and sodas? And did you bring it back on you next Disney vacation to enjoy more coffee and sodas? Well not any more! Disney will soon be updating their resort drink stations to accept RFID refillable mugs. This means your mug works only as long as you pay for, no more indefinite usage. Check out this review of the new system by the Disney Food Blog. It was such a great write up we wanted to share it with our readers.

This article was written by Wendy Pugh-Hummel of the Disney Food Blog:

News and Review!: Rapid Fill Refillable Mugs for Walt Disney World Resorts Now in Use
At the time of this writing, the mugs are in use at Disney’s All-Star Music Intermission Food Court and All-Star Movies World Premiere Food Court. (Disney’s All-Star Sports End Zone Food Court is currently closed for refurbishment). They will be rolled out at the rest of the Disney World resorts shortly.
As you may recall from a previous post on Rapid Fill Refillable MugsRapid Fill allows Disney Resort guests to buy (or receive as part of the Disney Dining Plan) a Resort mug which can be refilled for a certain period of time as designated at time of purchase. These mugs are enhanced by an RFID bar codewhich enables the mug to deactivate when the designated time is complete.
Perhaps you have some questions… I know I did! So, let’s get started!

Rapid Fill Refillable Mug Frequently Asked Questions

I’m not on a Disney Dining Plan, so I’ll be purchasing my mug separately. How much do they cost?
$8.99 for 1 Day
$11.99 for 2 Days
$14.99 for 3 Days
$17.99 for Length of Stay

Rapid Fill Prices.
What do the new mugs look like?
For now, just like the previous mugs. You’ll still see Mickey and a few of his pals enjoying some poolside fun. You’ll notice a few differences, however…
Guests can now choose from orange, purple, and green lids for the mugs (previous choices included blue, black, and bright pink).

Green, purple, and orange mugs.
The Rapid Fill logo has been added to the mugs.

Rapid Fill Logo.
You may notice a tiny bit of text to the right of the handle. It reads: “Refills available at no additional charge atResort Beverage Island located in the resort that this mug was purchased through the end of your resort stay.” Plus, there is some added text beneath it: “DO NOT MICROWAVE.”

Do not microwave!
Where can I fill my Rapid Fill Mug?
The text would seem to have answered that question. However, both the price signs and one of the Cast Members I spoke with indicated that Rapid Fill mugs can be used at “any resort self-service beverage location,” as long as they are used within the designated time frame.

Rapid Fill Information.
So how does it work?
First, you’ll purchase your mug and indicate to the Cast Member how long you wish to use it. I chose a “One Day” mug, but Length of Stay mugs can be determined by your Key to the World card (which will one day be a MagicBand… but that’s another story for another day!).
I chose a green mug. I like the new bright colors!

Green Rapid Fill Mug.
Next, you’ll go to the Beverage Island where you will see the Rapid Fill machines. You’ll know they are “Rapid Fill” by the little screens above the beverages. Pay attention to these – you’ll learn why momentarily :) .

Beverage Station with Rapid Fill Screens.

Rapid Fill Screen.
Then, place your mug on the tray beneath your beverage of choice. It MUST be on the tray. Otherwise the machine will not recognize your mug.

Rapid Fill Mug on tray.
This is where those little screens start their big job. If your mug isn’t properly placed on the tray, the screen will indicate this to you.

Place cup on tray message.
Once your mug is in place, press the button for your beverage of choice!

Filling the mug.
While your mug is being filled, the screen will display the date that your mug may be refilled through.

Refill date notice.
You’ll know when your mug has reached its capacity because the screen will say “Fill Complete.” (You’ll also know this because your mug will start to overflow ;) .

Fill complete.
Wow… I’m so thirsty that I downed an entire soda in 1 minute and 43 seconds! Can I refill again RIGHT AWAY?
Not so fast! The mugs are programmed so that you cannot refill them for two minutes after reaching the mugs “Fill Complete” capacity. (At least, this is how it timed out for me. I ran a test where I filled my mug at 12:28 pm. I was not able to refill until 12:30 pm, once the allotted seconds were up.)

How much longer until my next refill?
Okay. I’ve waited my allotted time. What now?
Refill and enjoy! Cheers!
I like to mix different beverages to make one drink. Can I still switch it up?
Me, too! I like to fill my cup with three quarters Pomegranate Lemonade and one quarter Sprite. This is my own personal recipe for my Disney Mocktail (you’re welcome ;) ). Yes, you can still do that, right up until the “Fill Complete” message appears.
What if I’m just a kid and not tall enough to read all those screens?
Then you, my tiny friend, will assume your mug is broken and yell for your parent. At least, that’s what I witnessed. Several times. ;)

Choose your mug!
I don’t drink very much soda, but I enjoy one every now and then. What are my options if I choose not to purchase a Rapid Fill mug?
You can still purchase a regular paper cup. I spoke with a couple of guests who chose them, and their cups were read by the machines as well. However, the screens displayed different messages. Upon the first fill, the message read, “3 refills within 1 hour” (then “2 refills,” and so on). The cups deactivate and can’t be refilled after one hour, or after 3 refills – whichever comes first.
What about water and ice?
I brought along a water bottle that was not connected to this program. As of this writing, water and ice remains free for all cups.
Whew! So, there you have it! We’ll be keeping an eye out to see if Rapid Fill Beverage Stations become operational in more Disney World Resorts over the coming weeks.

Tuesday, August 6, 2013

DIY Disney Shirts and Discount Code and Contest, Oh My!

I have a confession to make.  I love making my family wear matching Disney gear during our vacations.  They (for the most part) enjoy it too and it adds to the magical feeling of being at Disney. I stumbled across Mockingbird Monograms on Etsy and her cute chevron Mickey Ears iron on transfer and fell in love! This could not be easier.  You pick your design, tell her your initials, and she uses pixie dust (and email) to send your creation to you!  I recently did some shirts for a friend's girls who are heading to Disneyworld soon using Mockingbird Monograms transfers and they were adorable. BONUS, just for our readers, you get 50% off a transfer! Just type the code GUEST at checkout!


Materials: Iron, t-shirt, transfer paper, transfer, ink jet printer

***Note about transfer paper: The color of shirt you have will determine the type of transfer paper you buy. If it is a dark shirt, look for the transfer paper that says " for darker shirts". Likewise if the shirt is light, it will say " for light or white shirts". Easy peasy. Our shirt was white and we bought Avery T-shirt Transfersfrom Amazon for about $8. It comes with several sheets. ***

Step One: Order
Head over to Mockingbird Monograms and choose your design. Use a special discount code GUEST and get 1/2 off!

Step Two: Open
Mockingbird Monograms will send your transfer to you via email, open it and it will look like this ( in Windows Photogallery). All you have to do is print it out!
.


Step Three:Print
Make sure you read the instructions on your transfer paper to determine if you need to print a regular print or a mirror image print. Here is the transfer paper we used and our print out. You must use an ink jet printer.


Step Four:Trim
Cut around the design as closely to the edge as possible. I didn't get a picture of this but I cut around the outside red circle. 

Step Five:Iron
Simply lay the design on the shirt (follow instructions for your specific transfer paper) and use a hot iron to secure it.  I usually start with the edges and press firmly for about 10 seconds before moving on to a new spot. In all it takes about 60 seconds to iron on - How easy is that??


Step Six:Peel
Let the shirt cool for a few min and then find an edge of the top paper to start peeling.  Slowly peel away the protective paper and ta-daa! super cute personalized Disney shirt!


Contest now closed
 
So now you can make your own Chevron Mickey Shirt! Or even easier, WIN ONE! We will give away one personalized Chevron Mickey Ears shirt thanks to our friends at Mockingbird Monograms! So many ways to enter! For each of the following, you'll get one entry.
 
1. Leave a comment telling us your favorite place at Disney.
2. Start following us
3. Pin this post ( and comment saying you did)
4. Link us on your blog (and comment saying you did)
 
Don't forget to leave your email in the comments. Contest ends Monday August 5, 2013 at 7:00 pm CST.
 
Congratulations to Lynn B. who was the winner of our T-shirt contest. We'll get her information and send the shirt out right away. Stay tuned for future contests. Thanks for everyone who entered!
 

Happy Disney Crafting!! 

Wednesday, July 31, 2013

Thursday, July 25, 2013

Needing A Disney Drink Fix?

I'm not sure where you live, but where I am it is HOT! Perfect time to dream of cold Disney drinks!

Citrus Swirl at Adventureland

LeFou's Brew at New Fantasyland

Grand Marnier Slush at Epcot

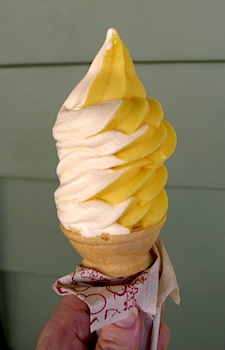
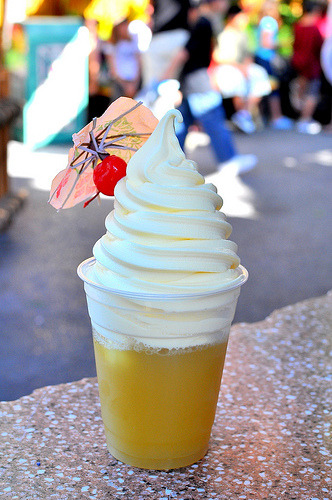
The beloved Dole Whip from the Poly (or Adventureland)
Months away from your next Disney fix? Put on your Mickey ears, turn on your fan, and make an at home version of these Disney treats! Here is a favorite from http://chocolatecoveredkatie.com/2013/06/05/dole-whip-recipe-bring-disney-to-your-kitchen/


Homemade Dole Whip Recipe

  • 2 cups frozen pineapple
  • 1/4 cup milk of choice (Try canned coconut milk for piña colada soft serve!)
  • 1/16 tsp salt
  • pinch pure stevia extract, or 2 tbsp sugar of choice
  • scant 1 tbsp lemon juice
Blend all ingredients until smooth. Scoop out with an ice cream scoop, or squeeze through a pastry bag, yonanas machine, or a plastic bag with an edge cut off. (If your blender is not super-powerful like a Vita-Mix, you may need to add a little more liquid and then freeze a bit before serving, or churn in an ice cream maker.) For soft-serve that holds its shape longer, freeze the swirled dole whip at least 20 minutes prior to serving. Makes 3 servings the size of the pineapple whip in the photos.
**Note: The Dole Whip and all of the variations (strawberry, mango, etc) are Vegan, yay!**

Monday, May 27, 2013

I'm a Disney Dining Plan Expert

We have used the Disney Dining Plan on every visit to Walt Disney World since 2006. That's a total of 7 vacations of stuffing my face with really great food. Now, the cost of the Dining Plan has increased annually since 2006 but I still believe it holds value, especially when it's free! (See previous post Free Dining) In this post you'll learn my tips for how to use the Dining plan most effectively.


First a quick disclaimer: The Dining Plan isn't for everyone, please do lots of research to determine if it's a good idea for your family. There are many sites who cover that. For the purposes of this post I'm assuming you are committed to the Dining Plan and looking to maximize your eats.

Disney offers three levels of the Dining Plan - Quick Service, Standard, and Deluxe. I recommend the Standard plan. The deluxe is too much food and time required to sit down and eat, while the quick service is only fast food. You can learn more about the plans here. The Standard Disney Dining Plan includes 1 table service meal, 1 quick service meal, and 1 snack per person per night, plus a refillable resort mug. In this post I will only cover the Standard plan.

How it Works
When you check in to your resort you receive your Key to the Kingdom Card (Now a Magic Band). This card is used for your room key, park ticket, meal credits, and to charge to your room anywhere on property. Below is one of my old cards from a previous vacation. When ready to use a meal credit (Quick Service - QS or Snack Credit -SC) tell the cast member behind the counter before you order. When eating at a Table Service (TS) restaurant your waiter/waitress will usually ask if you have a dining plan. If not be sure to let them know when they greet you. After each purchase or meal your receipt will show the remaining credit balance for the type of credit used.
My KtW card from 2008, the current cards look a little different.
The Snack
Each person in your party receives one snack credit per person per night. This may not seem like it's enough, but I promise you'll struggle to use them up by the end of your visit. You can use snack credits anywhere on WDW property including many places at Downtown Disney. Snacks available on the Dining Plan usually includes most items around $5.00 and below. You can find an unofficial list at this LINK. Our favorite snacks are anything from an ice cream cart, funnel cakes at Magic Kingdom's Sleepy Hollow, pretzels in Epcot's Germany (paired with an Oktoberfest beer), and Minnie's Bake Shop giant cookies found at most resort food courts. If it's your last day and you have too many credits to use, I recommend buying the cookies or rice krispy treats to take home with you because they travel well (if you don't eat them up on the way to the airport). Disney clearly marks all snacks using the logo below on menus and price tags.

Quick Service
Over the past several years Disney has continuously updated their Quick Service offerings to include healthier food and a broader selection. This is a huge improvement over the countless burger and chicken nugget spots around the Parks. Also, you will never go hungry at a QS location if you choose right. Each QS credit includes a drink, entree, side, and dessert. The portions are very large and easily split among 2 adults in many cases.  For example: at Flame Tree Barbecue in Animal Kingdom you can get a 1/2 BBQ Chicken with baked beans and coleslaw, plus a drink, and a dessert (key lime mousse for me). That is a ton of food!
Courtesy of Kingdom Hopping
Be Their Guest exclusive tip right here: So here is how you really extend your Dining Plan. Assume your a family of 4 with two adults and two children under 10. The Quick Service credits don't discriminate between child and adult. So you can order your kids an adult meal if they choose. And even better you can split 2 meals between the party of 4 and be able to eat two QS meals in one day. Plus if you plan a TS dinner, you will have breakfast, lunch, dinner, and 4 snacks to make it throughout the day. Like I said, you will not go hungry on the dining plan.

Table Service
One of my favorite moments of each day is sitting down to eat a great meal in the Parks or Resorts. Now some of you may cringe at eating in a Theme Park or at wasting your Park time sitting down but I highly recommend it and here's why.

  1. Disney restaurants have great food!
  2. Taking a break, especially if you have kids, is a must.
  3. The restaurants are air conditioned.
  4. Disney Cast Members provide great service.
The Table Service credits include a drink, entree, and dessert. Some restaurants have specialty shakes or smoothies that may be included as your drink, be sure to ask your server if you see something you want to try. Any children (under 10) on your plan must order from the kids menu. They will have something your child will eat and include a coloring sheet and crayons. We typically bring a couple toys to entertain our kids because the wait may be a bit long (usually less than 15 minutes depending on the crowds).

Disney will allow you to make reservations up to 180 days out. I highly recommend making reservations soon after you book your trip. You can always change them or make more if needed. We like to mix up our table service meals between breakfast, lunch, and dinner. In a 7 night trip we will have 2 breakfasts, 2 lunches, and 3 dinners. Character meals are a great way for your children to get time with your favorite pals. We like to book Character breakfasts very early inside a park or at a Magic Kingdom resort. If you book your meal before the Park opens you are allowed in to walk to your breakfast reservation. You have the chance for some great photo ops with no one around. Also, if your kids aren't early risers, one look and Mickey walking to their table will really perk them up! On days we plan to leave the park early we usually book a lunch in the Park since its a good way to rest and cool off without returning to your room. On full park days we will leave and let everyone rest/nap in the room at midday. Afterwards, we will grab an early dinner at a resort restaurant before heading back to the Park.
Courtesy of mouseforless.com
Lastly, remember tips are not included in the Dining Plan. You will need to budget accordingly for your trip. I usually estimate $15-20 per meal for a family of 4. 

Signature Dining
Several Disney restaurants are considered Signature Dining locations. At a signature dining restaurant you will find high quality food, beautiful decor, very prompt service, and they are kid friendly. Sounds great, what's the catch? A Signature Dining establishment uses 2 table service credits per person. That may sound like to big hit but I'll pass on a tip that should allow you to eat at least one time during your stay. The dining plan allots credits per night you stay. For example, your trip consists of 8 days and 7 nights, but don't immediately assume 7 table service meals. Usually on your travels days you will arrive in the late afternoon the first day and leave by noon on your last. Cramming in a sit down meal in a short window is hard to do, so here is what I recommend. Skip a table service meal the first and last days and combine that credit with another during a full day of your vacation. Then you can experience fine dining without the out of pocket costs (though I would gladly pay out of pocket at many Signature Dining locations).

Another Be Their Guest exclusive tip: Many Signature Dining locations offer a cheese sampler plate as an appetizer, but you may be able to get that instead of a dessert. Ask your server about this if you like cheese.

My hope in writing this post is for you to maximize your dining plan (whether free or paid). Visit the blog soon to see where I recommend using your dining credits and what are my favorite entrees. Thanks for reading!

Thursday, May 9, 2013

Disney Free Dining Offer

Disney released their FREE DINING offer today. This is one of the best discounts available. There is a limited arrival window of September 2 through the 25th. You will receive a free Quick Service or Standard Dining plan with a non-discounted stay at a Disney Resort.

We highly recommend the Disney Dining plan. We have traveled with the dining plan every visit since 2006. I will give more details in a future post. So book today since availability is limited and this is a very popular discount. More information in the link below.

Disney World Free Dining

Tuesday, February 5, 2013

Kids + Lines = Crazy Parents

Though our tips can dramatically reduce the amount of time spent  waiting in lines, unfortunately you and your little wigglers will not be able to go to Disney line free. So, let's talk about how to keep small people entertained in line. Disney is making a huge push to make their new queues interactive and retro fit their old ones with things for little hands to do. For example, Haunted Mansion at Disney World has two line options, a direct line or an interactive line.  Both get there about the same time, but the interactive side has huge crypts with games to play, instruments to touch, even squirting water!
image copyright Disney
The Many Adventures of Winnie the Pooh has an entire play area with a honey tree you can climb inside, bees to catch, musical honey pots, and more. Kids can play while their grow ups watch close by.

Play area at Winnie the Pooh

For the lines that are not interactive (or bus waits, sit down dining, etc.) you'll have to keep junior off the rails and focused. Our family always plays Disney trivia while we wait. We ask questions about characters, movies, rides, etc. This strategy usually works better toward the start of the trip while the excitement is still new. Flipping through your autograph books and seeing which characters you've already gotten or still need takes up some minutes as well. Before we leave for our trip I stock up on inexpensive stickers and colors and when we have our autograph books out, we create sticker stories or color characters. With colors or pens you can play tic tac toe, hangman or draw silly pictures. For my smallest guys I make busy bags. I usually make about 10 and rotate them out during the trip. They need to be quiet, easy to pack, and non messy. I put each one in individual sandwich bags and throw one or two in my bag each day. Here are a few that I did for the last trip.

1. Make a cupcake- Take different colored felt and cut several cupcake bases, tops, and toppings. They have so much fun mixing and matching and "baking" their cupcakes! This link includes a free download to make this busy bag!
http://savingandmore.com/cupcake-busy-bag-craft-idea/

2. Make a house- It's the same concept as above, but with felt roofs, bushes, doors, windows, etc.

3. Felt road- Make several road pieces from black felt that can fit together several ways. Draw lines down the middle for the road divider and a few matchbox cars to drive.
from www.teresabellamaria.wordpress.com

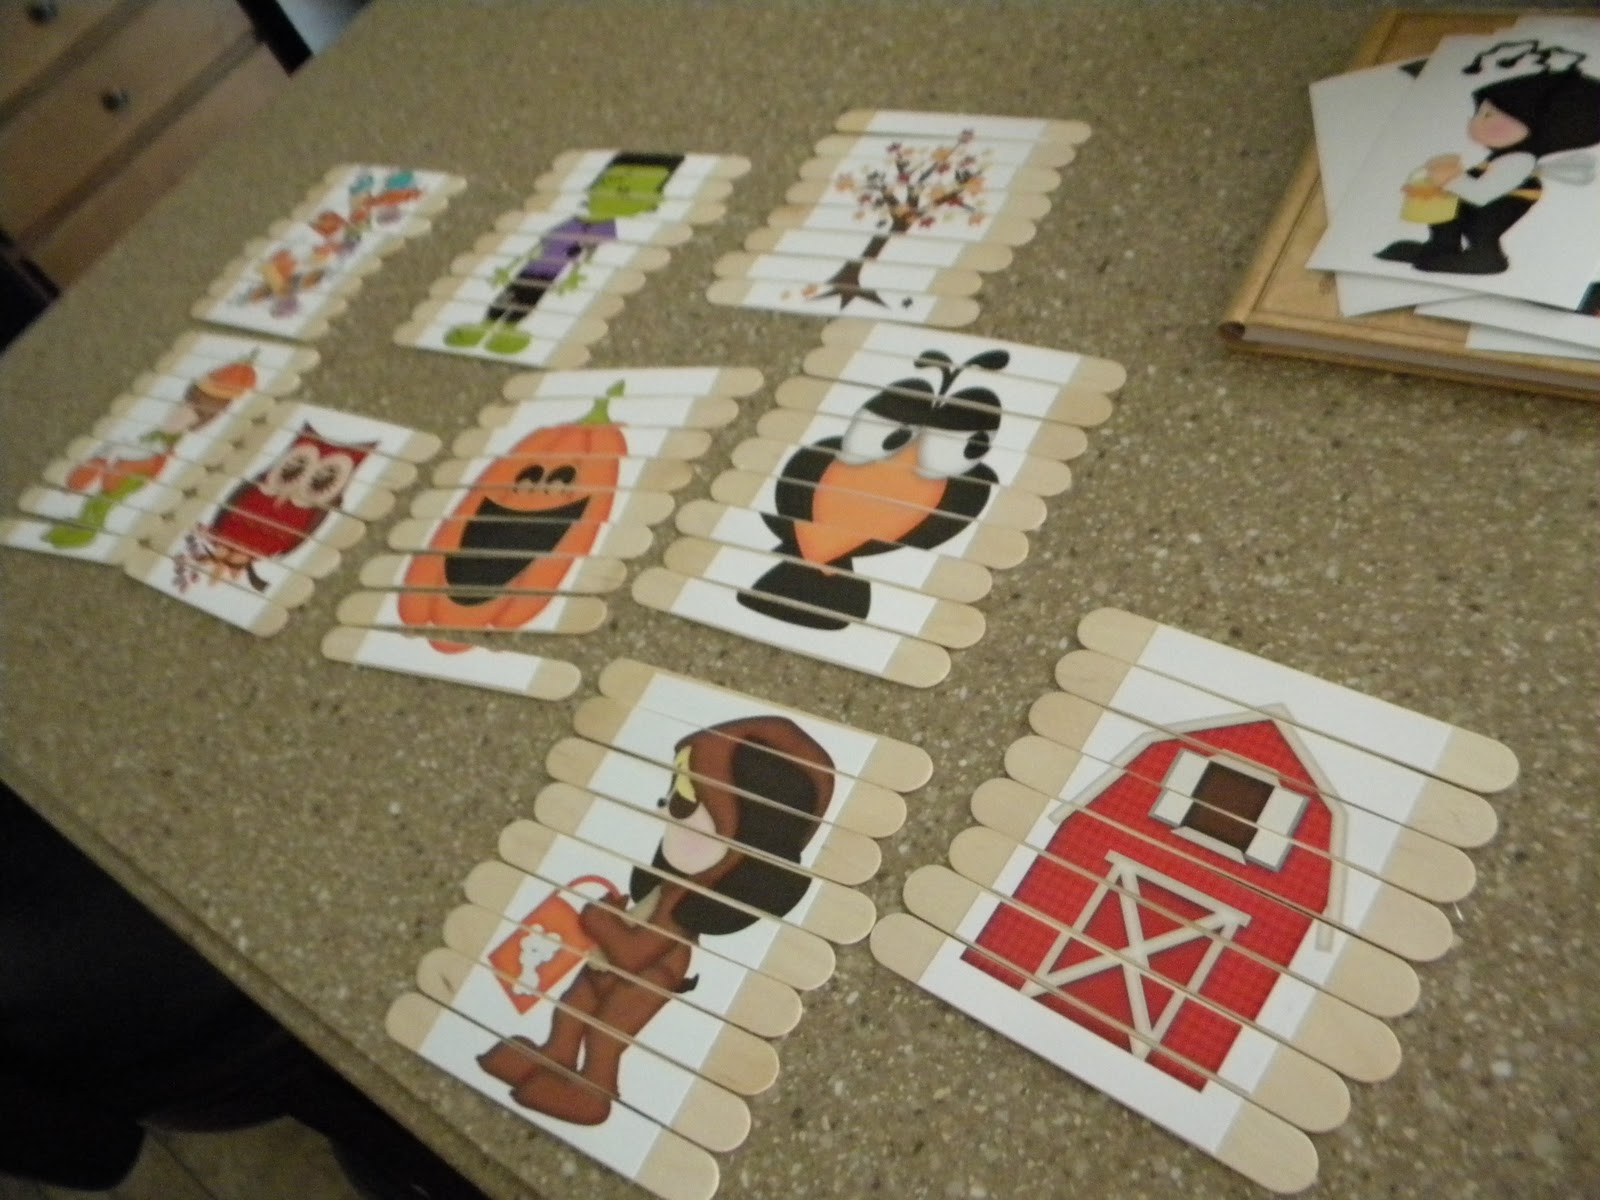
4. Popsicle Puzzles- Take a picture from a book or magazine and glue it on several Popsicle sticks. Cover with masking tape and they can mix them up and put them together.

5. Paint chip matching- Get pairs of paint chips from your hardware store. Cut one of the pair down and glue it on a clothes pin. Kids can match the colors together and pin each match to its mate.This blog has a great tutorial for it! I suggest getting the ones in the shape of Mickey of course.  Home Depot carries the Disney paint line.
http://thelittlehedgehog.blogspot.com/2012/03/busy-bag-matching-paint-chip-shades.html

6. Stringing buttons- Take pipe cleaners and several large buttons.  Have kids string them together.

These are just a few suggestions, the busy bag possibilities are literally endless. A quick search on Google or Pinterest will yield hundreds of ideas! Rotating the bags around keep the games fresh and the kids interested.  We also take small play sets and keep them in our backpack. Since we have boys, they are tiny car sets. They set them up on the ground in line and are happy for quite a while driving their cars all around. Every time we pull out the cars and car sets, we end up surrounded by little kids and have parents shoot us thankful looks. Pin trading is a good line distraction as well. Every cast member at Disney carries several little pins to trade. They have to trade with guests, so there is no threat that your child will be told no when they ask a cast member. My two older boys each have lanyards with pins and look forward to waiting in line to rearrange and survey their pins, plot their next trade, or just admire their work thus far! I try to look at line waiting time as a chance to be together, play games, and just be silly with my kids in this age of electronics and over packed schedules. If all else fails, there is always the iPhone!

Tuesday, January 29, 2013

Strollin, Strollin, Strollin (Part 2)


1. Bring your own, don't rent
2. Avoid double strollers if at all possible
3. Go as lightweight as possible
4. Avoid the buses if you have kids in strollers

If you have kids in strollers, the management of them will be a large part of your day.  Parking them, finding them again, getting from the room to the car/bus, pleading with your children to get into/out of them, etc.  You'll want to do everything in your power to make it as easy on yourself as possible.  We have Disney specific strollers at our house.  They certainly get used for other things, but they were bought with Disney in mind (with all that money you saved by not renting, remember??). For infants or very small kids who will need to nap in the stroller, take a "real" stroller.  The one with all the bells and whistles.  Try and pick one from the onset that folds quickly and easily but take it regardless.  We like the Britax B-Agile or the Peg Perego Pliko series.  They fold quickly but have great back support and padding for little guys. Plus they recline flat and have big shades.  After they are a bit older,  2+ usually, they aren't taking full on naps in the stroller.  It's then time to invest in a good, lightweight "umbrella" type stroller.  Don't make the mistake of getting the $30 ones that hang on the giant circular display at Babies R Us.  You will be miserable and so will kiddo.  They have no support/shade/recline and are usually too short to push easily.  Go ahead and invest (buy second hand) in a sturdy brand. We like the McLaren Triumph series.  You can put big kids in them for quick park crossing, but they are still comfortable enough for little guys as well.  They work easily with the stroller links we mentioned in part one. They turn well and fold like a dream. **TIP: on the first day buy a giant Mickey balloon and tie it to your stroller so it's easy to spot.  If it breaks or pops, they replace it for free anywhere they sell them**

 
Ok the buses.  We'll talk a great deal more about this, but we really don't recommend using the bus system if you have little guys, strollers, or multiple kids.  Disney offers guests staying on property the advantage of in-house bus systems to and from all the hotels and parks.  At the value resorts there is one main bus stop, at the moderate and deluxe hotels there are often multiple stations.  Since there is only one station, if you are at the value resort, you can often wait in line for 30 min + at peak times.  This is true about getting back to your resort as well. Even with multiple stops at the other resorts, leaving the parks at high traffic times is miserable. I can't tell you the number of times we watched the fireworks at a park, booked it to the the bus stop, waited 45min with tired, miserable kids only to have to stand on the crowded bus holding sleeping children while balancing folded strollers.Horrible. If you have bigger kids who are good at waiting, don't mind standing and don't need strollers, the buses are a huge help.  But renting a car changed how I felt about Disney. It took away a huge source of stress and crabbiness. My sister tried for several trips to get me to rent one and I always held fast to the buses.  Then I tried it. OMG ya'll. It changed the trip to and from parks from one of dread to a pleasure.  We could leave all our park junk in the car. Strollers, light sabers, fans, sunscreen, pin lanyards all in the car! No more balancing act with sleeping kids after a long day, no more spending a ton of time in lines before you even get to the parks. No more debate about if it was worth battling the crowd to watch the late night shows.And parking at the parks is free if you stay on property! The rental car isn't very expensive, it usually only adds about $150-250 to a trip, and it is BY FAR one of my strongest suggestions. 

Thursday, January 24, 2013

Strollin, Strollin, Strollin (Part One)

The stroller question is probably the number one question I get when friends ask me for Disney advice.  We've used (still do) strollers for all my boys, including my 7 year old, every time we go. It just makes traveling through the parks easier and faster. You can easily cover 5 miles a day wandering through the theme parks and it is just too much for little legs. And I'm sure your kid has walked all over Europe and Asia when they were only 3 and then ran a marathon the next day, but trust me, they will be whiny, hot, tired, and sore after standing in lines and crossing the parks all day. Do yourself a favor, keep them in a stroller for as long as you can! Not to mention it gives me an added sense of security that no kids will wander off in the (sometimes massive) crowd of Mickey admirers. So what are our recommendations?

1. Bring your own, don't rent
2. Avoid double strollers if at all possible
3. Go as lightweight as possible
4. Avoid the buses if you have kids in strollers

Renting: There are two options when it comes to renting strollers at Disney. You can rent from Disney themselves at any park and return the stroller at the end of every day or you can rent through an outside company and keep the stroller for the duration of your trip. The Disney strollers are great for older kids, like maybe 6 and up. They are a hard plastic shell like stroller that doesn't offer much shade and doesn't recline at all. https://disneyworld.disney.go.com/guest-services/stroller-rentals/ (see photo below). They have double and single stroller options. Renting is extremely easy, often just inside the turnstiles at every park. You get a large name placard that stays with your stroller all day and you simply drop the stroller off when you are done.  **BONUS you can drop them certain places in the park and simply get a new one later i.e. the train through Magic Kingdom**.  They are fairly pricey, with single strollers at $15 a day and double ones $31. For an average 6 day stay, that comes to a grand total of between $90- 186!! And you don't even get to use them to and from the parking lot or in the airport! For the same investment, we recommend you purchase a good, lightweight stroller (more to come on that) that you can reuse on subsequent trips. The second renting option is to go through one of several local companies and rent a stroller at a set price for the duration of your stay.  They often deliver it to your hotel room and pick it up as well.  You can choose from several makes and models and the price is fairly equivalent to Disney's rentals.  We still suggest bringing your own though to help with airport transport and to get the most out of your investment.  If it is the same $100 regardless, might as well own the stroller at the end of the trip.

Disney Rental Strollers (image courtsey of www.Magicaldreamtours.com)

Double or Single: Many people with more than one child often assume that a double stroller is the way to go when traveling to WDW or DL. Incorrect my grasshopper.  Double strollers are bulky, hard to turn, and hard to navigate through the large crowds of people. I don't care how amazing your triple level, platinum edition BOB type double stroller is, it is harder to use than a lightweight single stroller.  Every single one is hard to collapse to get on and off buses and monorails, a central part of your trip and one that can cause incredible stress. Plus, double strollers make it very difficult to split up when you need to. EVERY DAY that we are there we split up for something: bathroom breaks, nap time, snagging Fast Passes, big kid vs little kid rides, etc. We recommend getting two lightweight strollers and purchasing clips that can turn them into double strollers if needed like these Stroller Connectors or Stroller Links. That way, each parent can quickly and  easily maneuver/fold/separate a single stroller but you can link them and have one parent do double duty if necessary! What if I have more than two kids oh Disney oracle? Well it depends on the ages.  For my boys, (7, 3, and 6 mon) We do a regular stroller for baby so he can recline and nap if needed, and a lightweight stroller with a stand board for my middle and big boy. I would also consider a sit and stand before I did a double stroller. It gets us all where we need to be, no double stroller fuss, and we're able to split up if need be!
Stroller Connectors and Links

Check out Part 2 of Strollin, Strollin, Strollin